How To Upload And Manage Files On Your Web Server
One of the most efficient ways to upload and manage files on the web server is using FTP client. The full form of FTP is File Transfer Protocol. It is built on client-server model architecture which uses separate control and data connections between client and server. The FTP or file transfer protocol works in the same way as HTTP (hypertext transfer protocol) which also transfers web pages from server to user’s browser and SMTP (simple mail transfer protocol) for transferring electronic mail to the computer.
The FTP Software

We can transfer FTP between two computers using software called FTP software. Here the user’s computer is the local host which is connected to the internet. The other machine which is called the remote host is running FTP software which is also connected to the internet.
The local host machine is connected to the IP address of the remote host. Here the user would give username or password. The FTP software may have a GUI; the full form of it is GRAPHICAL USER INTERFACE, which allows the user to drag and drop files between remote and local host. Otherwise, a series of FTP commands are used to login to the remote host which transfers the files between the two machines. The main work of FTP is used to download a file from the server and also upload a file to the server.
About FileZilla

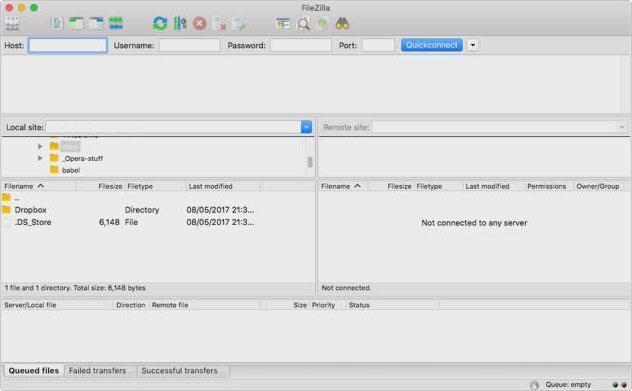
There are many FTP clients available in the market. One of the most popular options for Mac, Windows, and Linux is FileZilla. In FileZilla, you need an FTP hostname, FTP username, and FTP password.
- In FileZilla, after connecting to it, they will show you 2 panes.
- There is a list of directories with files in it on the left side. You have to select the folder which you are interested in to show the contents of the folder below.
- Whereas, on the right, you have a web hosting account, which by default is connected to the root of the website.
- A folder contains the website by the name www. We have to select that folder to see its contents.
How to upload a file using Notepad++?

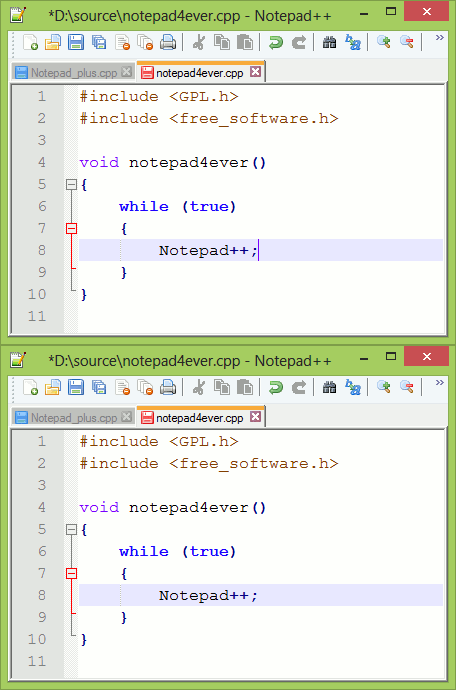
Another way to edit the file and upload it on the server is by using Notepad ++, which is a program that allows you to edit your site and upload and create files on the server.
To connect to Notepad++ through FTP we have to do the following steps:-
- At first, you have to open notepad+ +.
- Then you will go to the option Plugins followed by NPP FTP which will show NppFTP Window.
- You have to select the “gear” option in the configuration window.
- After this, you have to click on the button – Add New which prompts the configuration screen of NotePad ++ and FTP.
- After that, you have to enter your user name and click ok.
- Here we have to put the FTP detailed information which is located in the Connection tab.
- Then go to the Transfers tab to configure the below values.
- Active for Connection Type
- ASCII for Transfer Mode
- These settings are important. It makes sure that the permission remains similar even after any change is made to it.
- To finish you have to click on the close button and save the configuration.
After the profile has been created, you have to connect to it. For that, you have to press the disconnect button. After a few minutes, you will see your website’s content.
For uploading files, you have to –
Connect the server with Notepad ++. On the right side of Notepad ++, you have to choose the folder you want to upload the file to. After right-clicking on that folder, you have to select “Upload other files here”.
After this, you have to browse the server for the files you want to upload, for selecting and opening the file. Now the files will be seen in the folder section of the server. Also in notepad++, the user can download and then modify various files at once.
How to upload files using file manager?

If you don’t want to use either Notepad ++ or FileZilla, you can simply use File Manager. It is good to use as when you are away from the computer, you can still access the browser. The file manager can be accessed from any location.
To upload files to the server using file manager the following steps has to be taken:
- You can log in to CPanel and here under files option, you have to select file manager.
- Select Web Root and show hidden files and then click go.
- Click to open the folder to which you want to upload the files.
- Click Upload option from the toolbar and select browse or choose files.
- Select the file on your computer that you wish to upload.
- Once the files have been selected, it automatically gets uploaded.
- Additional files may be selected by the user once the upload is in progress.
The above methods are some of the ways you can use to upload and manage files in the web server. The files mentioned can be any type of files such as images, videos, music files, documents, books, pdf etc. The images can also be of any type such as JPG, PNG, GIF, etc. The music files can have any extensions such as MP3, WAV etc. FileZilla does not have any limitation on the amount or size of the file you want to upload to its server. However, your internet speed will determine whether it can upload large files or not.
However, opening large files can be a hindrance in Notepad++, so for that other editors can be used such as EditPad Lite or EM Editor which can manage large files. Super Byte Hosting is the leading Domain and Hosting selling company in India. It is one of the best web hosting, reseller hosting and domain provider in India. For good and affordable rates use Super Bytes Hosting. Their performance is top-notch and is good value for money.


